Saved Form Module
Overview
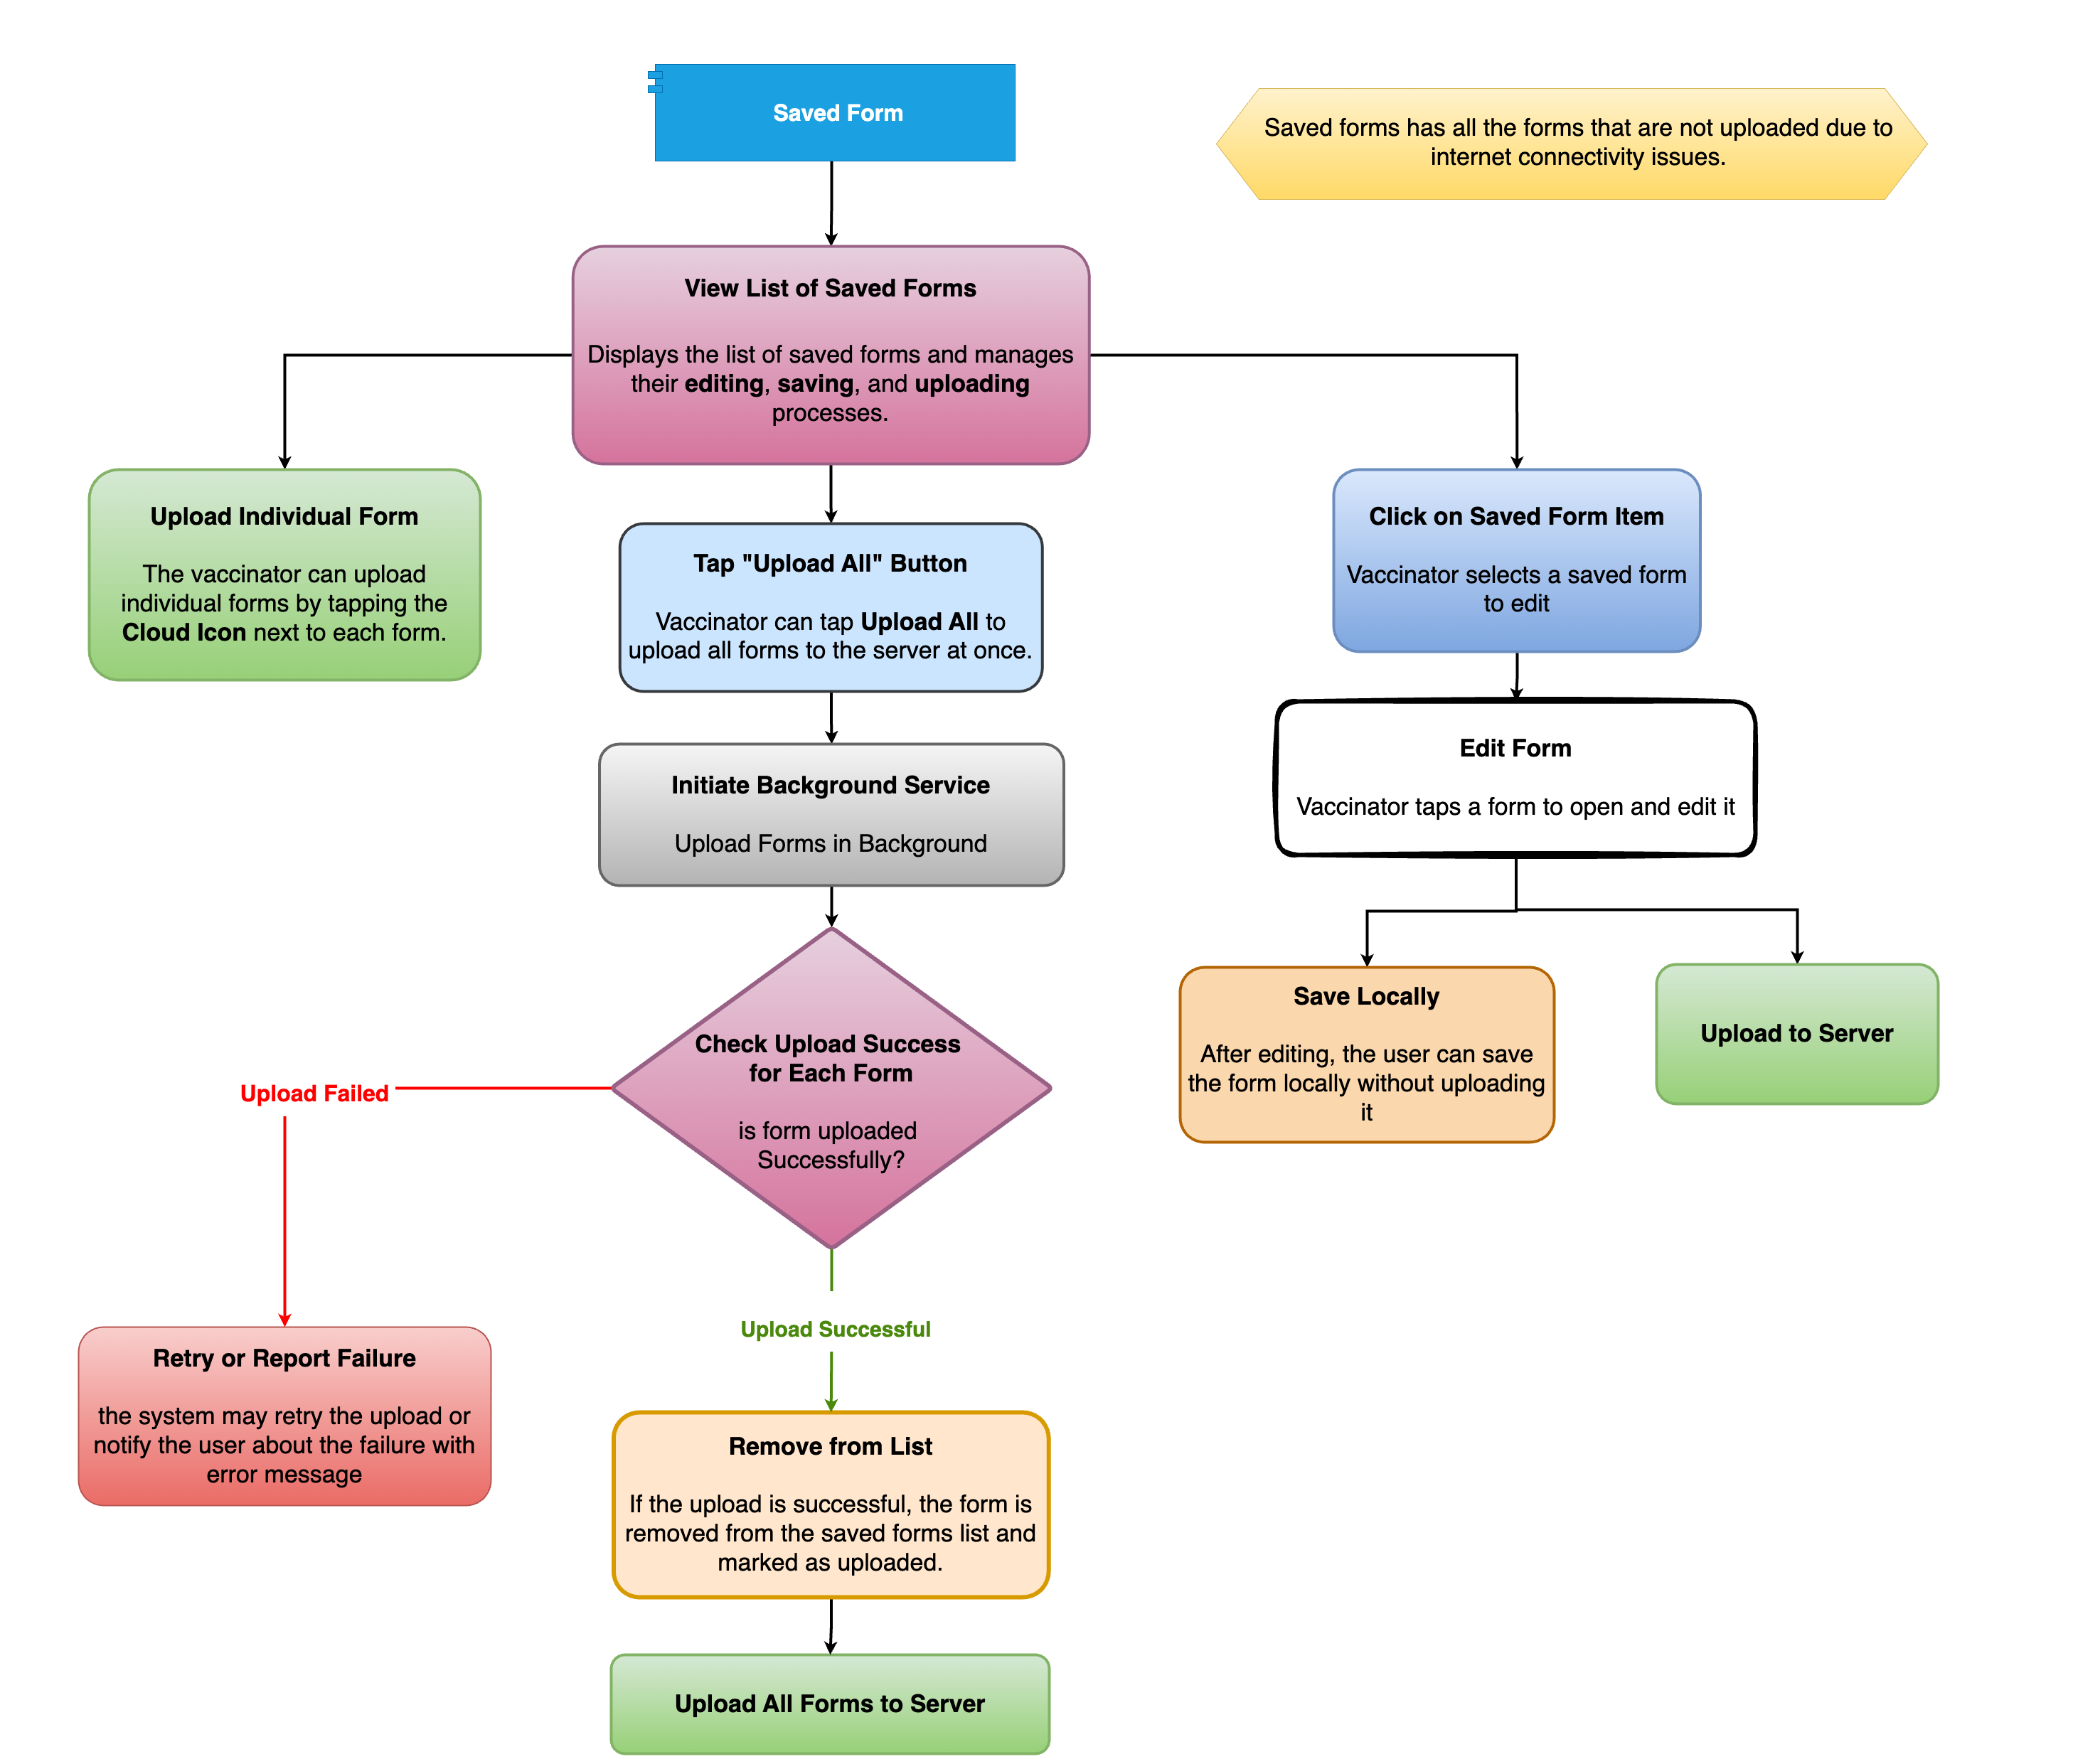
The Saved Form Module in the ZM app is designed to manage forms that could not be uploaded due to internet connectivity issues. This module allows vaccinators to view, edit, and upload saved forms individually or in bulk when internet connectivity is restored.
Key Features of the Saved Form Module
1: Storage of Unuploaded Forms
- Forms that are not uploaded due to network issues are stored in the "Saved Forms" section.
2: Viewing Saved Forms
- The vaccinator can view a list of all saved forms and manage their editing, saving, and uploading processes.
3: Uploading Forms
The vaccinator has two options for uploading:
- Upload Individual Form: By tapping the cloud icon next to a specific form.
- Upload All Forms: By tapping the "Upload All" button, all forms are uploaded at once.
4: Editing Saved Forms
The vaccinator can select any saved form, edit it, and either:
- Save it locally without uploading.
- Upload the edited form to the server.
5: Upload Process & Background Service
- When uploading, the app initiates a Background Service that handles form uploads in the background.
6: Upload Success Check
The system checks if each form is uploaded successfully:
- If successful, the form is removed from the saved list.
- If failed, the system either retries the upload or notifies the user of the failure.
Process Flow of the Saved Form Module (Based on Flowchart)
1: Saved Form Storage
- Forms that are not uploaded due to network issues are stored in "Saved Forms."
2: View List of Saved Forms
- The vaccinator accesses a list of all saved forms.
3: Uploading Options
- Upload Individual Form: Tap the cloud icon to upload a single form.
- Upload All Forms: Tap the "Upload All" button to initiate bulk upload.
4: Background Upload Process
- The app runs an upload process in the background to ensure smooth uploading.
5: Checking Upload Success
The system verifies if each form was uploaded successfully:
- If Upload Fails: The system retries or informs the user with an error message.
- If Upload Succeeds: The form is removed from the saved list.
6: Editing Forms
Users can select a saved form, make necessary edits, and either:
- Save Locally: Store the form without uploading.
- Upload to Server: Directly upload the edited form.
Flowchart Explanation
The flowchart visually represents the Saved Form Module process:
1: Saved Form (Blue Box) → Contains all unuploaded forms.
2: View List of Saved Forms (Pink Box) → Displays the list of saved forms.
3: Uploading Options:
- Upload Individual Form (Green Box) → Uploads one form.
- Upload All (Blue Box) → Uploads all forms in bulk.
4: Background Upload Process (Grey Box) → Uploads forms in the background.
5: Upload Check (Purple Box) → Determines if the upload is successful or failed.
- If Failed (Red Box) → Retry or notify the user.
- If Successful (Yellow Box) → Remove the form from the saved list.
6: Editing Forms:
- Click on a Form (Blue Box) → Opens form for editing. - Editing Actions:
1. Save Locally (Orange Box) → Keeps the form saved without uploading. 2. Upload to Server (Green Box) → Uploads after editing.
Flowchart